Android AlertDialog Example

Android AlertDialog can be used to display the dialog message with OK and Cancel buttons. It can be used to interrupt and ask the user about his/her choice to continue or discontinue.
Android AlertDialog is composed of three regions: title, content area and action buttons.
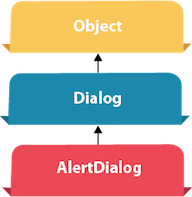
Android AlertDialog is the subclass of Dialog class.
Methods of AlertDialog class
| Method | Description |
|---|
| public AlertDialog.Builder setTitle(CharSequence) | This method is used to set the title of AlertDialog. |
| public AlertDialog.Builder setMessage(CharSequence) | This method is used to set the message for AlertDialog. |
| public AlertDialog.Builder setIcon(int) | This method is used to set the icon over AlertDialog. |
Android AlertDialog Example
Let's see a simple example of android alert dialog.
activity_main.xml
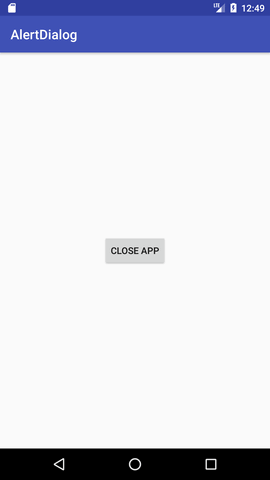
You can have multiple components, here we are having only a textview.
File: activity_main.xml
- <?xml version="1.0" encoding="utf-8"?>
- <android.support.constraint.ConstraintLayout xmlns:android="http://schemas.android.com/apk/res/android"
- xmlns:app="http://schemas.android.com/apk/res-auto"
- xmlns:tools="http://schemas.android.com/tools"
- android:layout_width="match_parent"
- android:layout_height="match_parent"
- tools:context="example.javatpoint.com.alertdialog.MainActivity">
-
- <Button
- android:layout_width="wrap_content"
- android:layout_height="wrap_content"
- android:id="@+id/button"
- android:text="Close app"
- app:layout_constraintBottom_toBottomOf="parent"
- app:layout_constraintLeft_toLeftOf="parent"
- app:layout_constraintRight_toRightOf="parent"
- app:layout_constraintTop_toTopOf="parent" />
-
- </android.support.constraint.ConstraintLayout>
strings.xml
Optionally, you can store the dialog message and title in the strings.xml file.
File: strings.xml
- <resources>
- <string name="app_name">AlertDialog</string>
- <string name="dialog_message">Welcome to Alert Dialog</string>
- <string name="dialog_title">Javatpoint Alert Dialog</string>
- </resources>
Activity class
Let's write the code to create and show the AlertDialog.
File: MainActivity.java
- package example.javatpoint.com.alertdialog;
-
- import android.content.DialogInterface;
- import android.support.v7.app.AppCompatActivity;
- import android.os.Bundle;
- import android.view.View;
- import android.widget.Button;
- import android.app.AlertDialog;
- import android.widget.Toast;
-
- public class MainActivity extends AppCompatActivity {
- Button closeButton;
- AlertDialog.Builder builder;
- @Override
- protected void onCreate(Bundle savedInstanceState) {
- super.onCreate(savedInstanceState);
- setContentView(R.layout.activity_main);
-
- closeButton = (Button) findViewById(R.id.button);
- builder = new AlertDialog.Builder(this);
- closeButton.setOnClickListener(new View.OnClickListener() {
- @Override
- public void onClick(View v) {
-
-
- builder.setMessage(R.string.dialog_message) .setTitle(R.string.dialog_title);
-
-
- builder.setMessage("Do you want to close this application ?")
- .setCancelable(false)
- .setPositiveButton("Yes", new DialogInterface.OnClickListener() {
- public void onClick(DialogInterface dialog, int id) {
- finish();
- Toast.makeText(getApplicationContext(),"you choose yes action for alertbox",
- Toast.LENGTH_SHORT).show();
- }
- })
- .setNegativeButton("No", new DialogInterface.OnClickListener() {
- public void onClick(DialogInterface dialog, int id) {
-
- dialog.cancel();
- Toast.makeText(getApplicationContext(),"you choose no action for alertbox",
- Toast.LENGTH_SHORT).show();
- }
- });
-
- AlertDialog alert = builder.create();
-
- alert.setTitle("AlertDialogExample");
- alert.show();
- }
- });
- }
- }
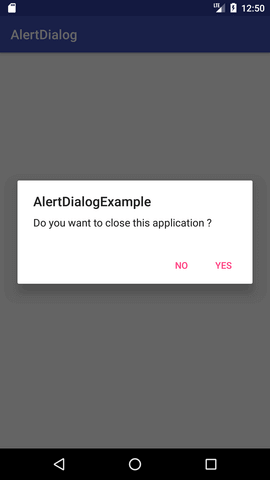
Output:


No comments:
Post a Comment