Android Option Menu Example
Android Option Menus are the primary menus of android. They can be used for settings, search, delete item etc.
Here, we are going to see two examples of option menus. First, the simple option menus and second, options menus with images.
Here, we are inflating the menu by calling the inflate() method of MenuInflater class. To perform event handling on menu items, you need to override onOptionsItemSelected() method of Activity class.
Android Option Menu Example
Let's see how to create menu in android. Let's see the simple option menu example that contains three menu items.
activity_main.xml
We have only one textview in this file.
File: activity_main.xml
- <?xml version="1.0" encoding="utf-8"?>
- <android.support.design.widget.CoordinatorLayout xmlns:android="http://schemas.android.com/apk/res/android"
- xmlns:app="http://schemas.android.com/apk/res-auto"
- xmlns:tools="http://schemas.android.com/tools"
- android:layout_width="match_parent"
- android:layout_height="match_parent"
- tools:context="example.javatpoint.com.optionmenu.MainActivity">
-
- <android.support.design.widget.AppBarLayout
- android:layout_width="match_parent"
- android:layout_height="wrap_content"
- android:theme="@style/AppTheme.AppBarOverlay">
-
- <android.support.v7.widget.Toolbar
- android:id="@+id/toolbar"
- android:layout_width="match_parent"
- android:layout_height="?attr/actionBarSize"
- android:background="?attr/colorPrimary"
- app:popupTheme="@style/AppTheme.PopupOverlay" />
-
- </android.support.design.widget.AppBarLayout>
-
- <include layout="@layout/content_main" />
-
- </android.support.design.widget.CoordinatorLayout>
File: context_main.xml
- <?xml version="1.0" encoding="utf-8"?>
- <android.support.constraint.ConstraintLayout xmlns:android="http://schemas.android.com/apk/res/android"
- xmlns:app="http://schemas.android.com/apk/res-auto"
- xmlns:tools="http://schemas.android.com/tools"
- android:layout_width="match_parent"
- android:layout_height="match_parent"
- app:layout_behavior="@string/appbar_scrolling_view_behavior"
- tools:context="example.javatpoint.com.optionmenu.MainActivity"
- tools:showIn="@layout/activity_main">
-
- <TextView
- android:layout_width="wrap_content"
- android:layout_height="wrap_content"
- android:text="Hello World!"
- app:layout_constraintBottom_toBottomOf="parent"
- app:layout_constraintLeft_toLeftOf="parent"
- app:layout_constraintRight_toRightOf="parent"
- app:layout_constraintTop_toTopOf="parent" />
-
- </android.support.constraint.ConstraintLayout>
menu_main.xml
It contains three items as show below. It is created automatically inside the res/menu directory.
File: menu_main.xml
- <menu xmlns:android="http://schemas.android.com/apk/res/android"
- xmlns:app="http://schemas.android.com/apk/res-auto"
- xmlns:tools="http://schemas.android.com/tools"
- tools:context="example.javatpoint.com.optionmenu.MainActivity">
-
- <item android:id="@+id/item1"
- android:title="Item 1"/>
- <item android:id="@+id/item2"
- android:title="Item 2"/>
- <item android:id="@+id/item3"
- android:title="Item 3"
- app:showAsAction="withText"/>
- </menu>
Activity class
This class displays the content of menu.xml file and performs event handling on clicking the menu items.
File: MainActivity.java
- package example.javatpoint.com.optionmenu;
-
- import android.os.Bundle;
- import android.support.v7.app.AppCompatActivity;
- import android.support.v7.widget.Toolbar;
- import android.view.Menu;
- import android.view.MenuItem;
- import android.widget.Toast;
-
- public class MainActivity extends AppCompatActivity {
-
- @Override
- protected void onCreate(Bundle savedInstanceState) {
- super.onCreate(savedInstanceState);
- setContentView(R.layout.activity_main);
- Toolbar toolbar = (Toolbar) findViewById(R.id.toolbar);
- setSupportActionBar(toolbar);
- }
-
- @Override
- public boolean onCreateOptionsMenu(Menu menu) {
-
- getMenuInflater().inflate(R.menu.menu_main, menu);
- return true;
- }
-
- @Override
- public boolean onOptionsItemSelected(MenuItem item) {
- int id = item.getItemId();
- switch (id){
- case R.id.item1:
- Toast.makeText(getApplicationContext(),"Item 1 Selected",Toast.LENGTH_LONG).show();
- return true;
- case R.id.item2:
- Toast.makeText(getApplicationContext(),"Item 2 Selected",Toast.LENGTH_LONG).show();
- return true;
- case R.id.item3:
- Toast.makeText(getApplicationContext(),"Item 3 Selected",Toast.LENGTH_LONG).show();
- return true;
- default:
- return super.onOptionsItemSelected(item);
- }
- }
- }
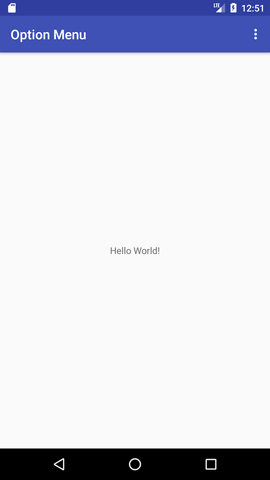
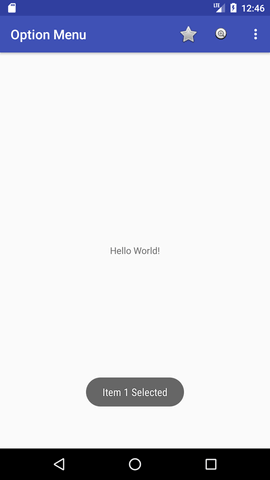
Output:
Output without clicking on the menu button.
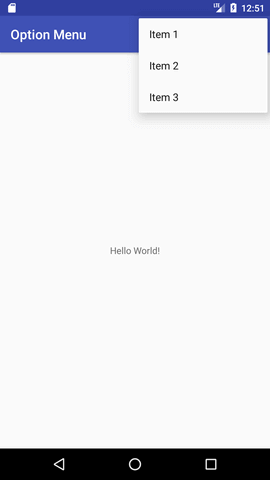
Output after clicking on the menu button.
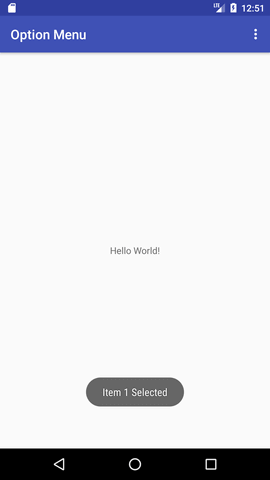
Output after clicking on the second menu item .
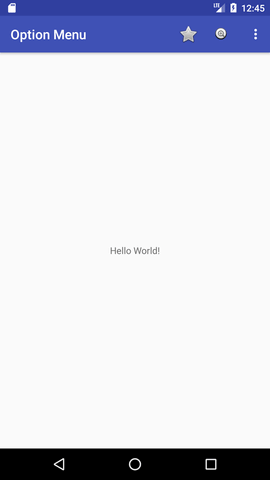
Option Menu with Icon
You need to have icon images inside the res/drawable directory. The android:icon element is used to display the icon on the option menu. You can write the string information in the strings.xml file. But we have written it inside the menu_main.xml file.
File: menu_main.xml
- <menu xmlns:android="http://schemas.android.com/apk/res/android"
- xmlns:app="http://schemas.android.com/apk/res-auto"
- xmlns:tools="http://schemas.android.com/tools"
- tools:context="example.javatpoint.com.optionmenu.MainActivity">
-
- <item android:id="@+id/item1"
- android:title="Item 1"
- app:showAsAction="always"
- android:icon="@android:drawable/btn_star"/>
- <item android:id="@+id/item2"
- android:title="Item 2"
- app:showAsAction="ifRoom"
- android:icon="@android:drawable/btn_plus"/>
- <item android:id="@+id/item3"
- android:title="Item 3"
- app:showAsAction="withText"
- android:icon="@android:drawable/btn_plus"/>
- </menu>


No comments:
Post a Comment